A guest room refresh doesn’t have to mean tearing everything apart. Sometimes the biggest visual change comes from the smallest detail — and one of the most underrated details in any room is the door hardware.
I found that out firsthand when I decided to give my guest room a makeover on a $300 budget. No new furniture, no painting, no redecorating from scratch. Just a handful of intentional swaps that made the whole space feel polished and put-together. The single change that made the most difference? Swapping out the old door knobs for a set of Schlage Accent Levers with Camelot trim in satin brass.
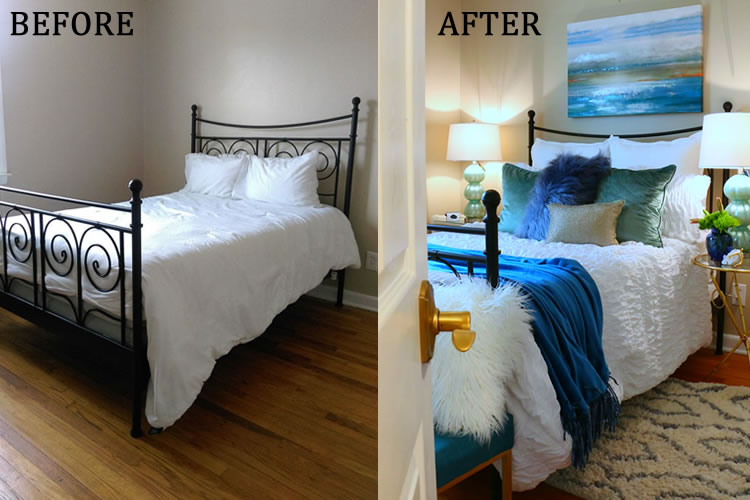
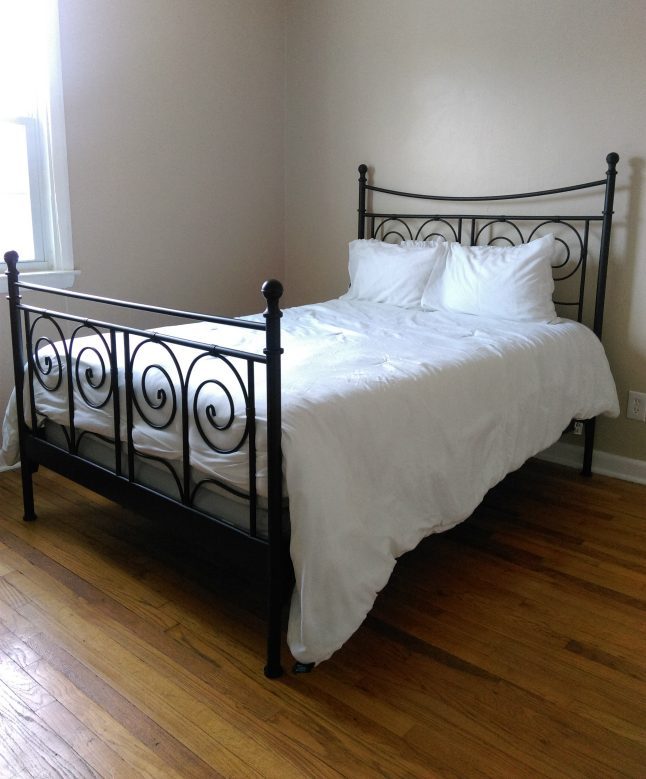
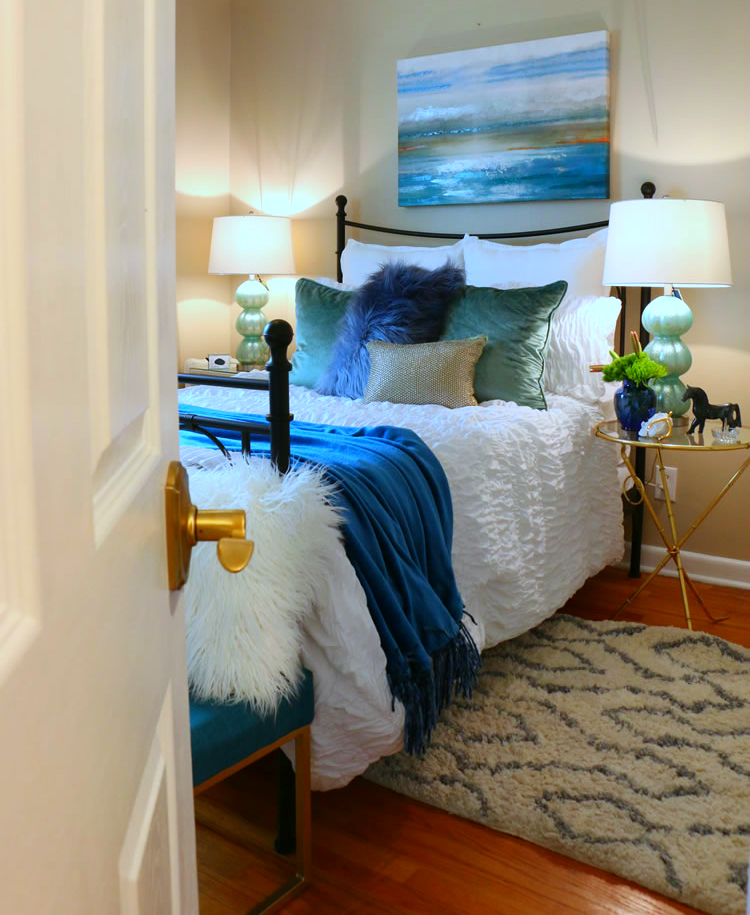
The Guest Room Before
The room itself was fine. Nice bed, good light, nothing wrong with it. But it felt a little dated. The kind of space that works but doesn’t quite feel finished. The door hardware was part of that. Brass knobs from who knows when, starting to show their age. It’s one of those things you don’t notice until you swap it out. Then you can’t stop noticing. (I did a whole coastal guest room refresh around the same time, same idea, different vibe.)
How to Change Door Hardware: It’s Easier Than You Think
Changing door hardware is genuinely one of the easiest home projects you can do. No special tools, no experience needed. If you can use a Phillips screwdriver, you can do this. The whole thing took me less than ten minutes per door.
Here’s what you need: the new lever set (obviously), a Phillips screwdriver, and that’s it. No drilling, no patching, no measuring. The new hardware goes right into the same holes the old stuff came out of.
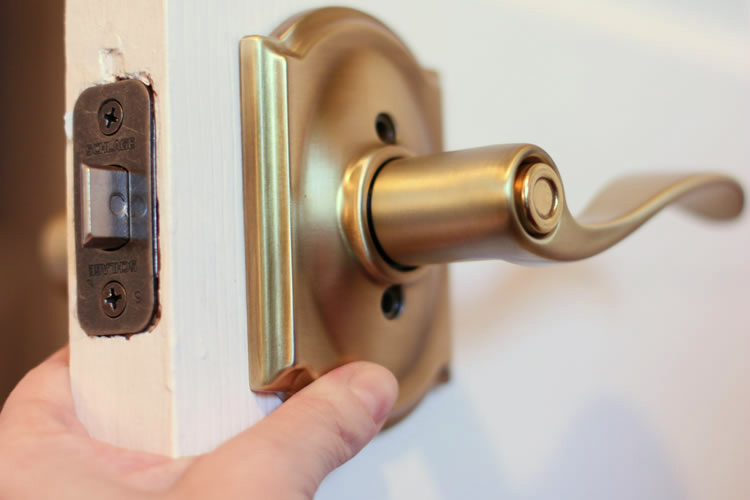
Step 1: Take Off the Old Handle
Start on the interior side of the door. There are usually two screws holding the lever or knob in place. Sometimes they’re visible, sometimes there’s a small cover plate you pop off first. Unscrew those, pull the lever off, and the interior piece comes right out.
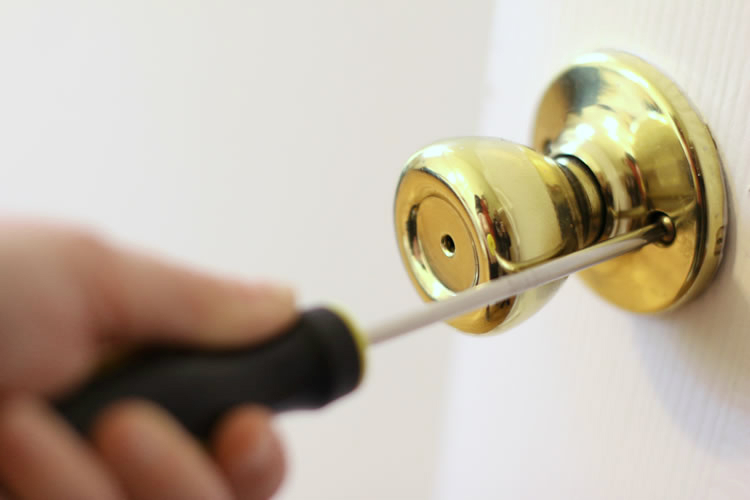
Step 2: Remove the Latch and the Exterior Knob
Once the interior piece is off, the exterior knob or lever will pull straight out. Then unscrew the latch from the edge of the door — usually two screws. Pull it out and set the whole old assembly aside.
Step 3: Open Up the New Hardware
Everything you need comes in the box. The lever, the latch, the strike plate, and the install instructions. Worth a quick read-through before you start. Schlage’s instructions are clear, and it saves you from guessing which piece goes where.
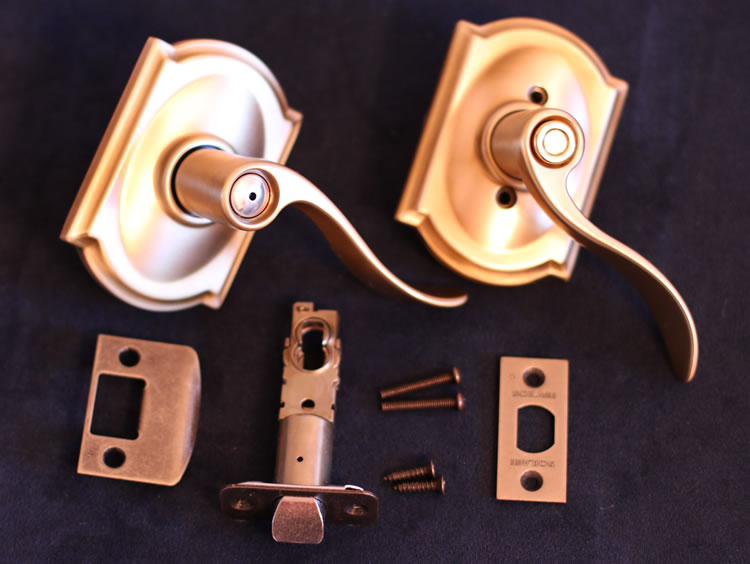
Step 4: Install the New Latch
The new latch goes in the same spot the old one came out of. Slide it in, make sure the angled part of the latch faces the right direction (it should catch when you close the door), and screw it in. Two screws. Done.
Step 5: Put the New Lever On
Slide the exterior lever onto the spindle from the outside, then attach the interior piece from inside the door. Line up the holes, thread in the screws, and tighten them down. That’s it.
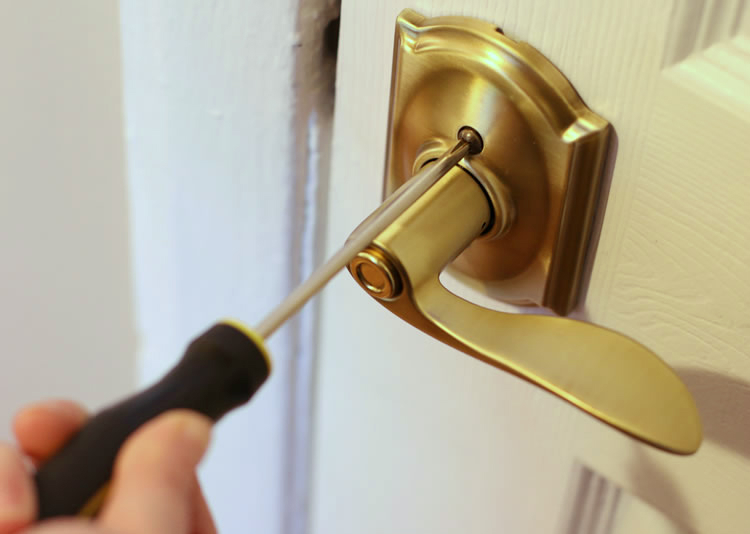
Step 6: Test It
Close the door and try the lever a few times. Should catch and release smoothly. If it feels stiff, the latch might need to be turned around. Just unscrew and flip it. Once it’s clicking the way it should, you’re done.
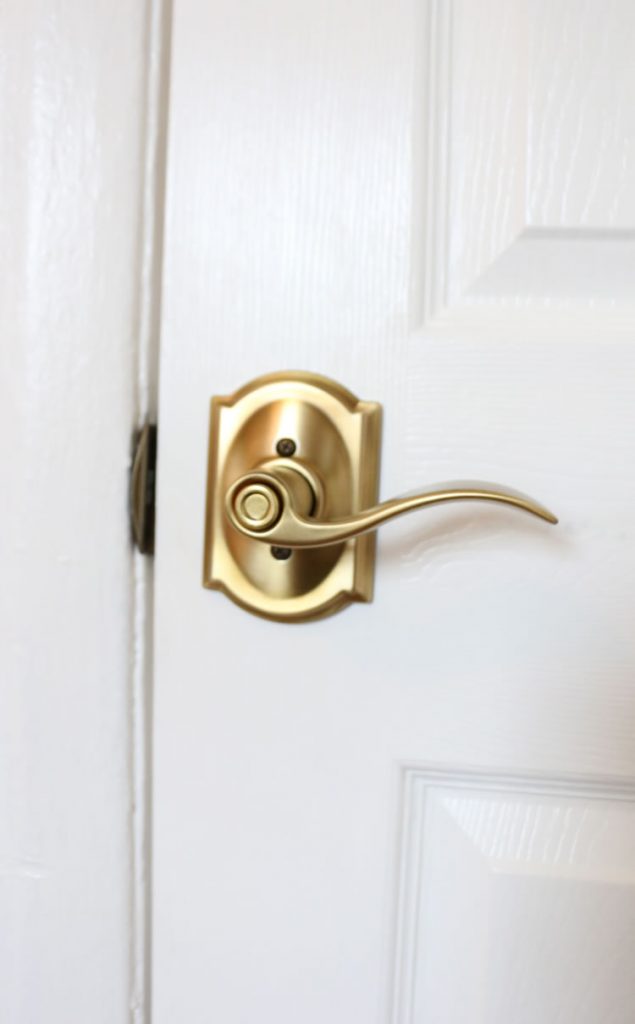
Why the Accent Lever Was the Right Pick
I spent a while looking at options before I landed on this one. Door hardware comes in a lot of styles and finishes, and it’s easy to get overwhelmed. The Style Selector tool actually helped a lot. You pick your door style and it narrows down what works. For my guest room, the Accent Lever in satin brass was the obvious choice. The lever style feels more modern than a round knob, the Camelot trim has just enough detail to look intentional without being fussy, and satin brass ties everything together without being shiny or flashy. If you’re trying to nail that balance between classic and modern, this post on blending styles is a good starting point.

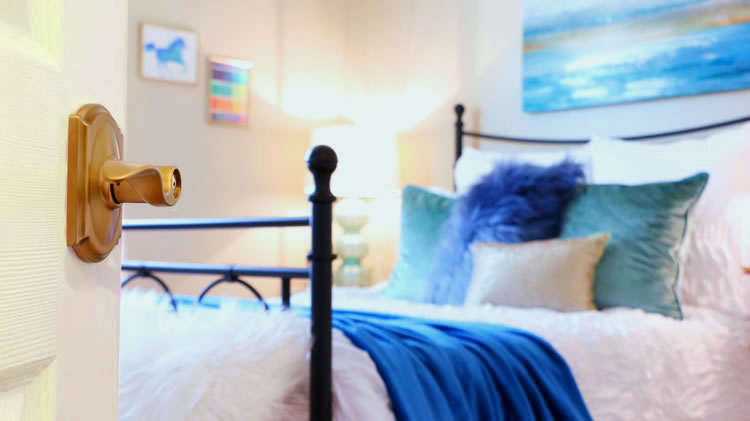
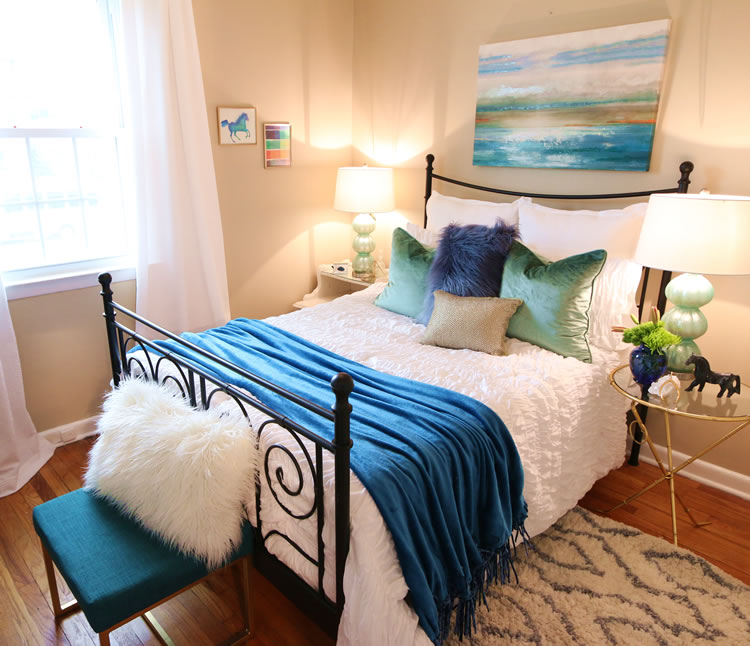
The Guest Room After
Same room. Same bed. Same everything, except now it actually feels finished. That’s the thing about details like door hardware. They don’t jump out at you, but they shift how a space reads. The new levers pulled together the warm tones I already had going, and the whole room just looks more cohesive. For a $300 makeover, it’s one of the better returns I’ve gotten on a home project.
The Takeaway
If you’ve been thinking about freshening up a room but don’t want to commit to a full renovation, start with the details. Door hardware is one of the easiest swaps you can make — under ten minutes, no special skills, and the difference is real. I did the same kind of budget refresh in my master bedroom and it’s become one of my favorite projects on the site. The Schlage Accent Lever with Camelot trim is a solid choice for anyone looking to upgrade without overthinking it. And if you want to see how it fits with the rest of your space before you buy, the Style Selector on Schlage’s site is genuinely useful.
Happy refreshing.

Disclosure: This post was originally created in partnership with Schlage and has since been updated with current information. All opinions are my own.
Better Living uses affiliate links. If you make a purchase through them, we may receive a small commission (for which we are deeply grateful) at no cost to you.