Do you love to grill, but don’t do it as often as you like? Maybe you don’t like the hassle or your outdoor living space won’t accommodate a BBQ? Or maybe you don’t have an outdoor living space?
A new kitchen appliance by Ninja called the Ninja® Foodi™ Grill is about to change all that and make grilling easy year-round, even if you have limited space to work with. We got a chance to give it a test drive before its official release and after using it for a few weeks we’re officially hooked!
Not only does the Ninja Foodi Grill grill foods amazingly (see below), but it also performs a variety of other functions to make it worthy of adding to your collection of kitchen appliances.
If you’re currently thinking, “Do I really need another kitchen gadget?” – let me be the first to tell you, yes.
Keep reading to see what our first impressions are and scroll down for the first yummy recipe we created using the Ninja Foodi Grill.
First Impressions And Grilling Experience with Ninja Foodi Grill
When I first learned about the Ninja Foodi Grill, I have to admit I was skeptical about how it would perform. I wondered if it actually gives food those amazing grill marks. Would the flavor be there? Would the food be juicy? Would we get that beautiful caramelization if the meat was glazed with a BBQ sauce or marinade?
I can now confidently say the answer is yes, yes, and yes. Not only is it an amazing indoor grill, but it exceeded my expectations in every way.
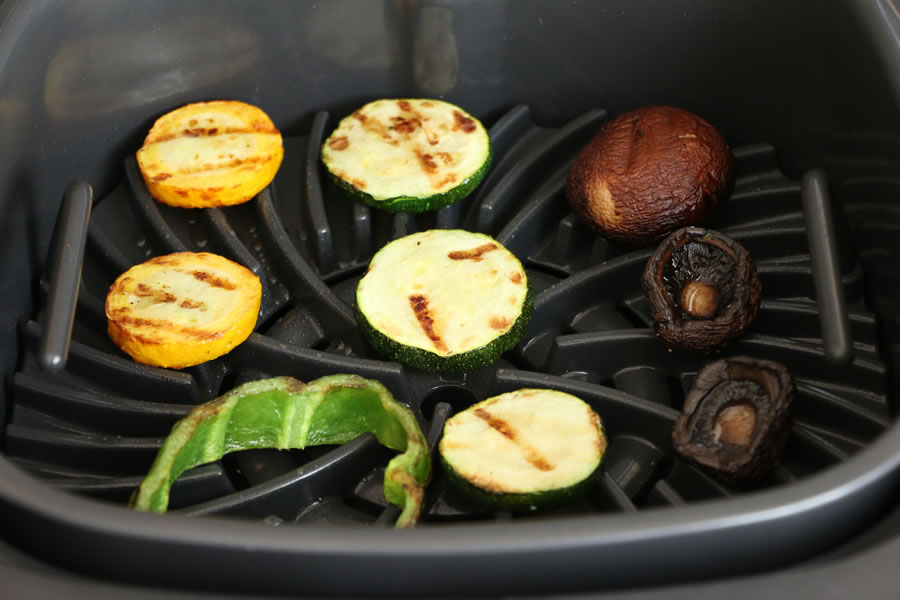
My first test cooking with the grill was with some zucchini and squash simply seasoned with salt and pepper along with some jumbo shrimp I had marinating.
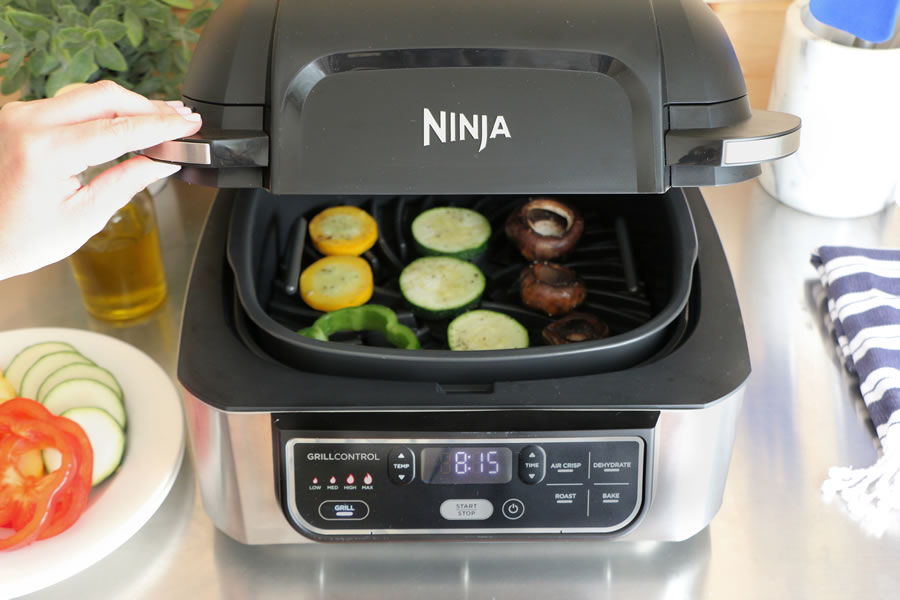
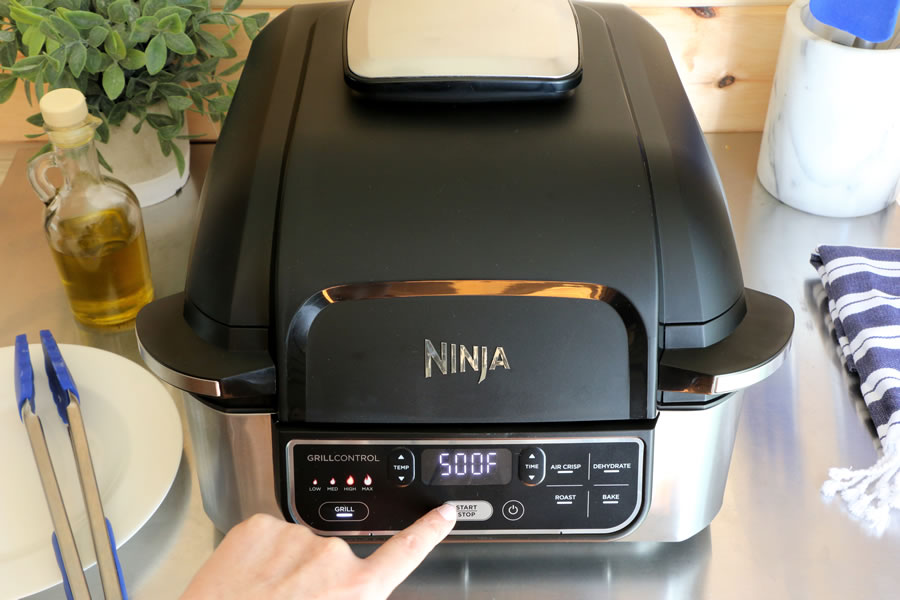
The grill can take up to 8 minutes to pre-heat so this is a good time to do any prepping or other tasks you might need to do. I made sure the grill grate was inserted and selected the max heating setting for 510 degrees, which is suggested for grilling the shrimp and veg.
The display on the unit will show the pre-heating progress and alert you with an ‘ADD FOOD’ message. This is your cue to open the hood and get that food on the grill.
I tossed my veggies in a bowl with some grapeseed oil and got them on the grill first. It’s recommended to flip halfway between cooking so you get those gorgeous grill marks on both sides. I forgot to do that, but the amazing result is pictured just below.
Ninja Foodi Tip: It’s recommended you use oils with a high smoke point like canola, grapeseed, or avocado to prevent smoking while grilling.
Now check out these amazing grilled shrimp made with the Ninja® Foodi™ Grill:
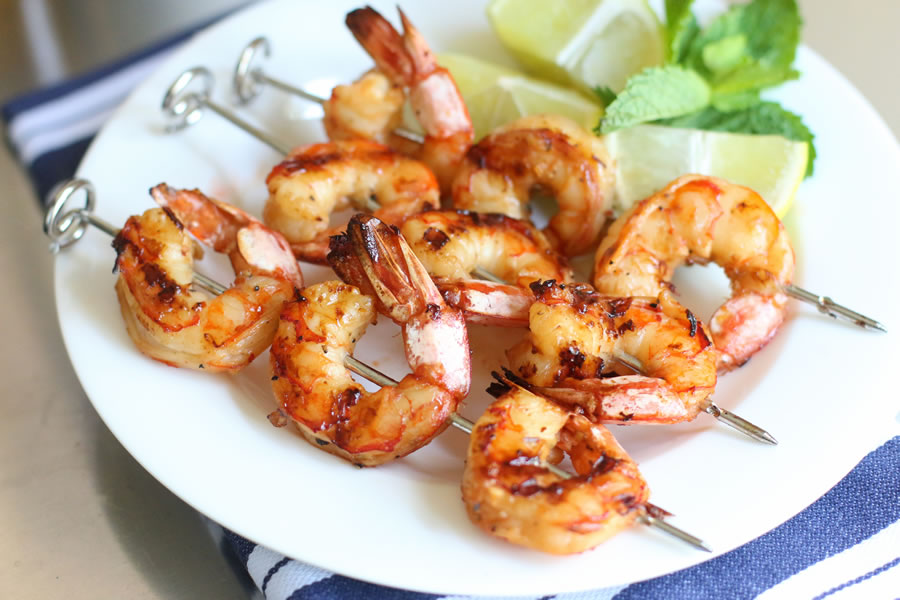
Aren’t they gorgeous? The veggies also came out tender and amazing.
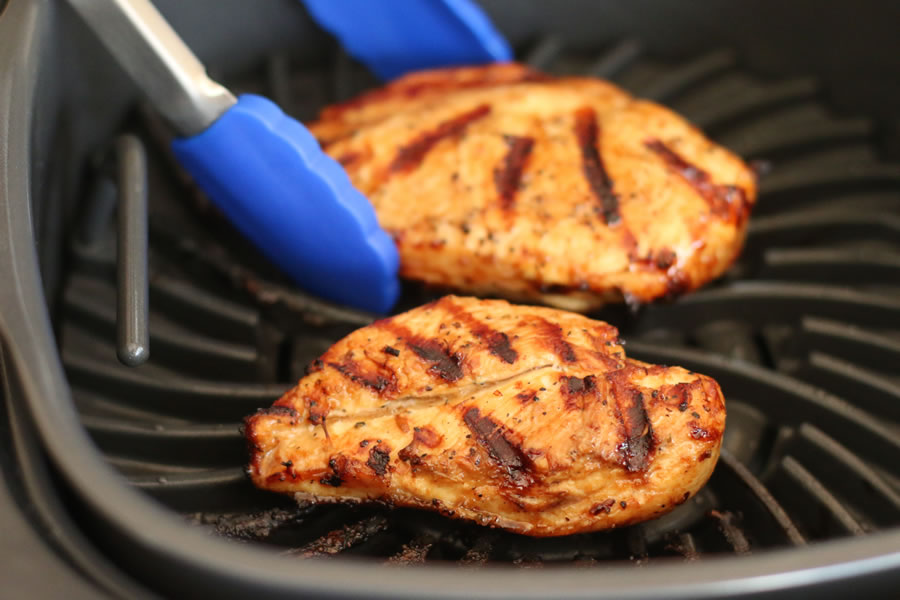
And check out these grill marks on the chicken breasts!
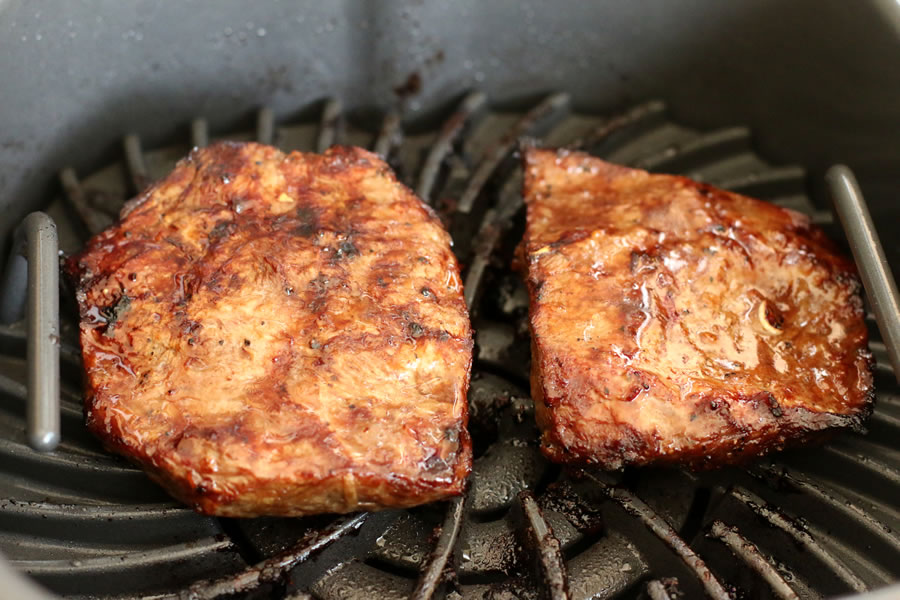
These steaks aren’t looking too shabby either…
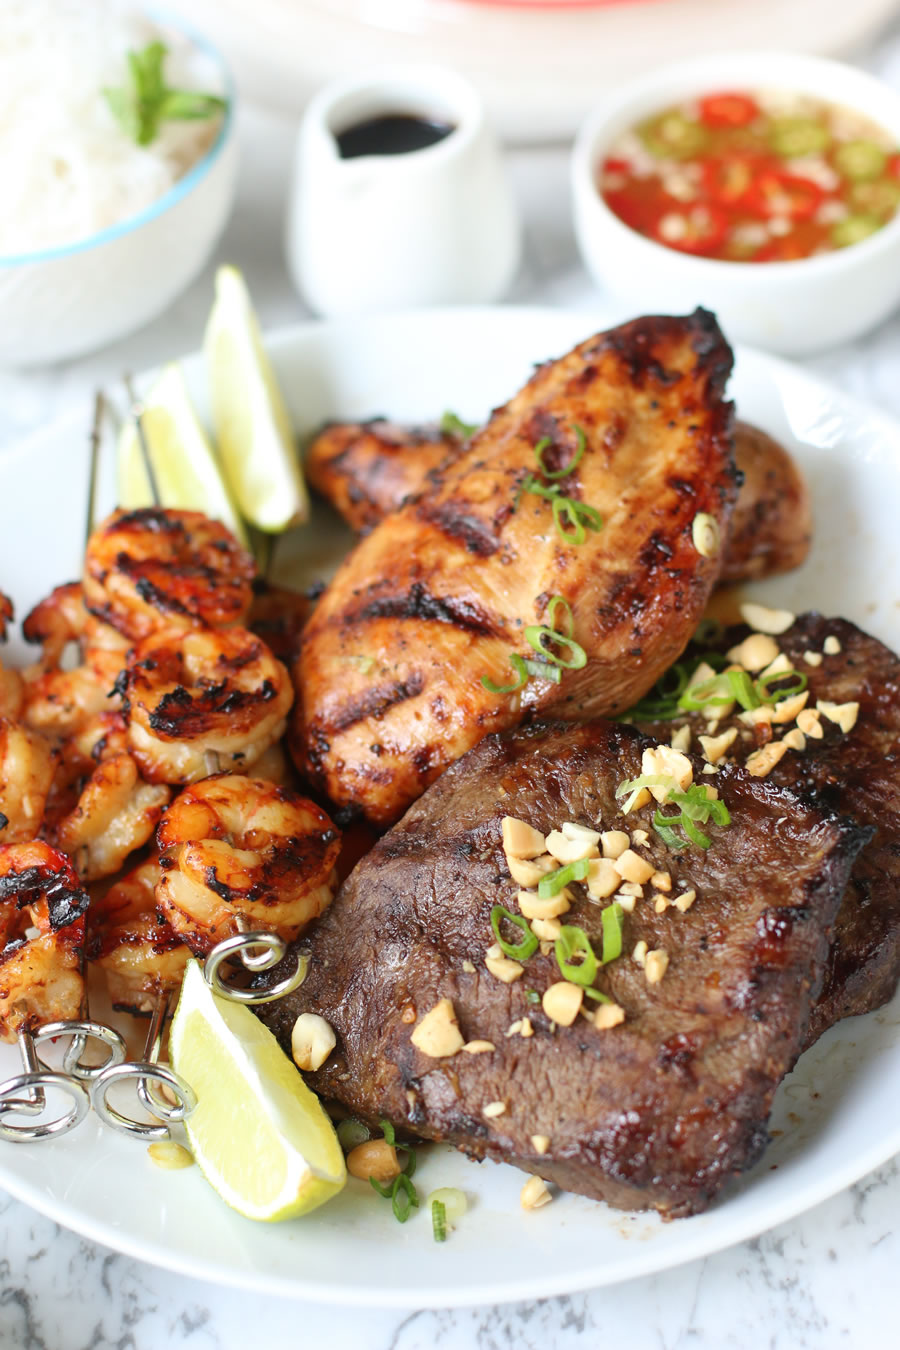
When deciding what else I wanted to make I realized some of my favorite grilled dishes come from Vietnamese restaurants. That’s when I knew I had to make something similar for the Ninja Foodi Grill!
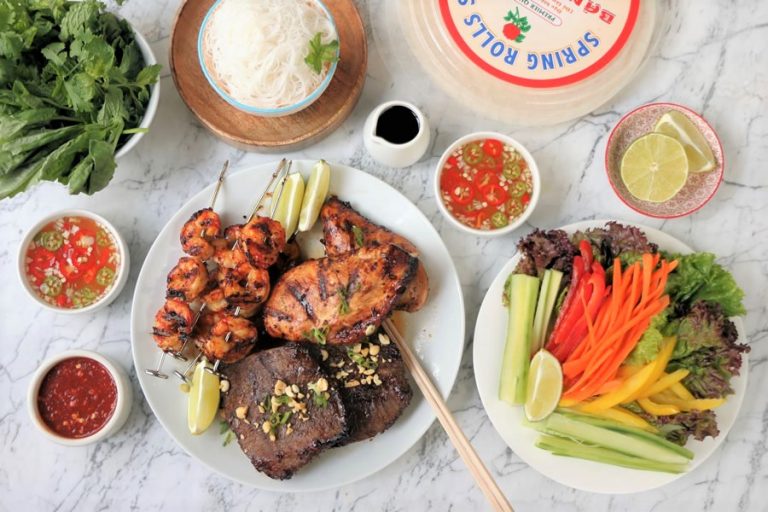
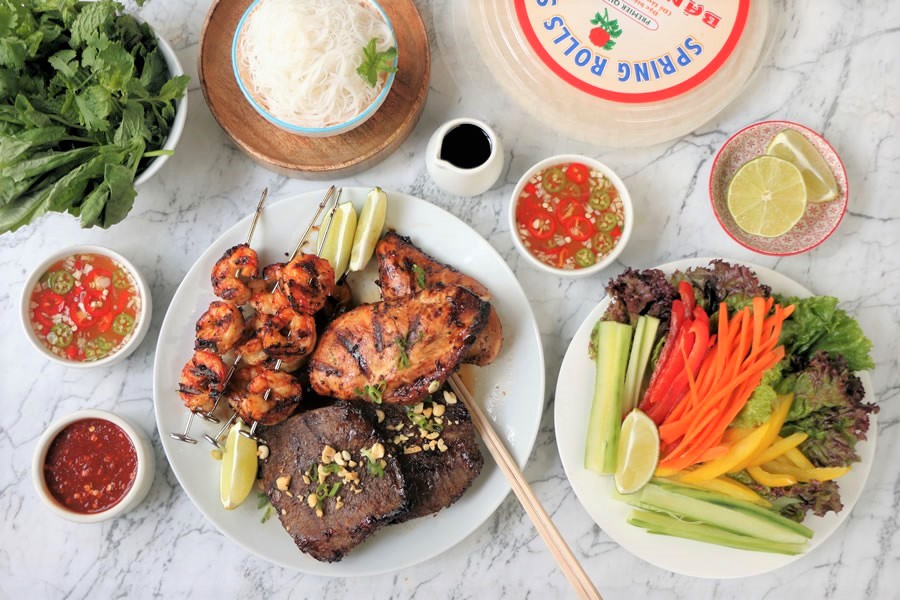
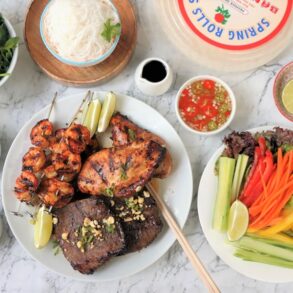
Check out this delicious Vietnamese-inspired mixed grill platter we made below.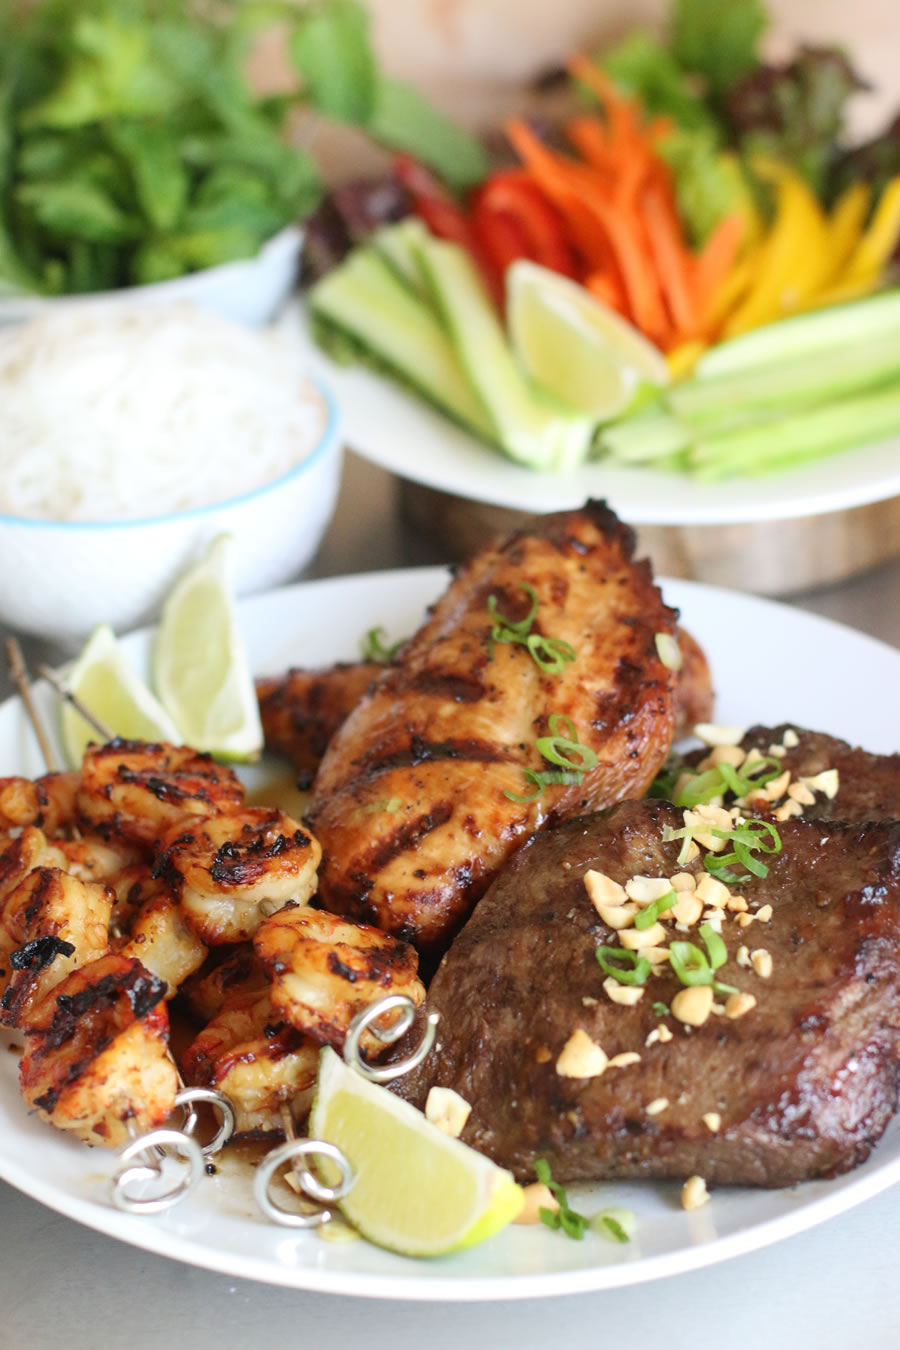 Check out our recipe for Vietnamese Style Mixed Grill recipe made using the Ninja Foodi Grill at the bottom of this post.
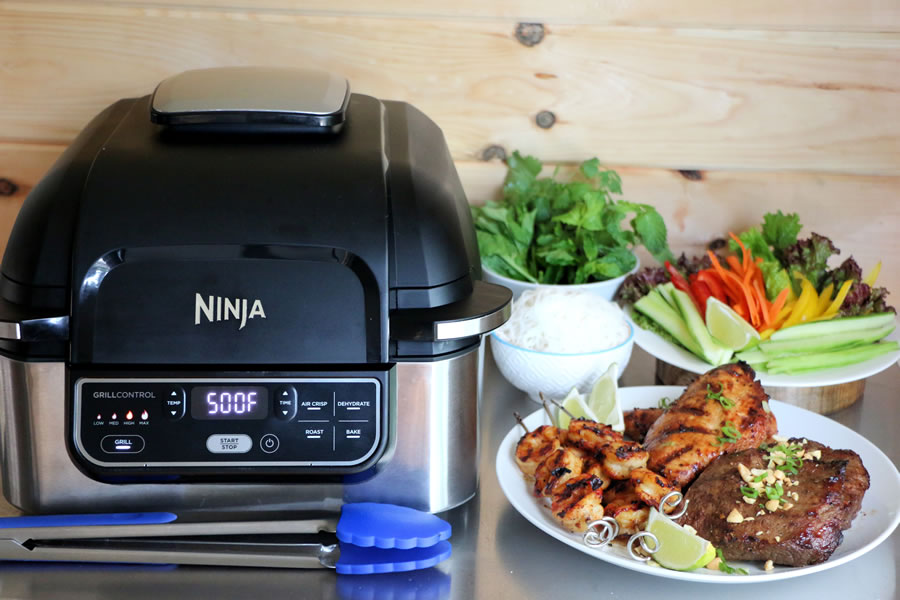
Heating Up The Ninja Foodi Grill
You can get the Ninja Foodi Grill started by selecting the cooking function you’d like and set your timer. You can also adjust temperatures on the display panel as well. Once programmed the grill will begin to pre-heat.
Once you pick your cooking function, temperature and time, the unit will begin to pre-heat. Higher temperatures will take up to approximately 8 minutes to heat up. This is a perfect time to assemble ingredients, set the table or finish cleaning some dirty dishes.
You have a choice to grill at 4 different preset temps for grilling:
- Low – 400 °F (bacon, sausages, calzones, meats with thick sauces)
- Medium – 450 °F (frozen meats, steak tips, etc. )
- High – 500 °F (steaks, burgers, chicken, hot dogs, etc.)
- Max – 510 °F (pizzas, veggies, fruit, kebabs, fresh and frozen seafood)
Temperatures can be set much lower if you are performing other functions like air crisping, baking, or dehydrating.
Air Crisping With The Ninja Foodi Grill
After I found the Ninja Foodi Grill knocked grilling out of the park I couldn’t wait to try the air crisper function. It allows you to essentially ”fry” and crisp foods with air circulation instead of traditional frying that uses oil.
The benefit is a healthier way to enjoy “fried” foods without all the extra fat and calories. In the end, you still get that satisfying crispy crunchy exterior that only frying can give you.
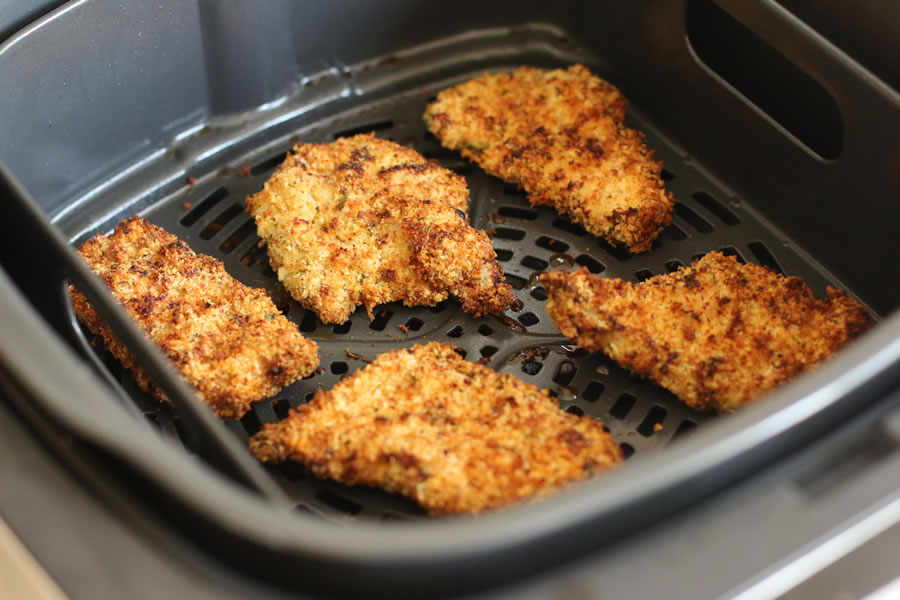
I first tested it out with some chicken cutlets I had marinated in garlic, vinegar, and spices and then breaded. Usually, I fry them in olive or grapeseed oil on the stove top and they come out crispy on the outside yet super moist on the inside. But frying is messy and not super healthy.
Using the Ninja Foodi Grill air crisper function I couldn’t believe how quickly they cooked and how super crispy the final result was.
It was official: The air frying function on the Ninja Foodi Grill also worked amazingly well!
Here’s my first batch of air-crisped chicken cutlets:
Tip: You cannot grill and air crisp at the same time in this unit, so you’ll have to make a cooking plan for your recipes if making a meal using both settings.
What Else Can The Ninja Foodi Grill Do?
The capability to perform a variety of different functions has been the current trend for kitchen appliances released in the last couple of years. And this is a good thing.
Finally, companies are beginning to understand that most of us have limited counter and storage space. The Ninja Foodi Grill falls right in that category of a multi-function appliance. Not only does it grill like a total rock star, but it also roasts, bakes, and dehydrates.
Jerky anyone?
What Comes In The Ninja Foodi Grill Box
Here’s what came in the box (some models may come with different accessories or functions):
The Ninja Foodi Grill Unit – This is the main unit that can cook food at temperatures as high as 510 or as low as 135 for dehydrating. To turn on, press the power button on the front display and then choose a cook function (grills, air crisp, dehydrate, roast or bake). The top part of the Ninja® Foodi™ Grill, or the hood, lifts to reveal the interior where different cooking accessories can be inserted. A splatter guard on the underside protects the heating element from grease and can easily be removed to clean. The Ninja Foodi Grill can be set up on a counter, kitchen table or small kitchen cart. Just make sure you have enough clearance to open the hood.
Cooking Pot (dishwasher safe) – Shaped like a deep roasting pan this is inserted first into the Ninja Foodi Grill is used to catch drippings when grilling or air frying. You can also use this part by itself to roast or bake foods. You can even insert a cake or pie pan inside to bake up a lovely dessert.
Grill grate (dishwasher safe) – This gets inserted over the cooking pot for grilling and is part of the magic that helps the Ninja Foodi Grill superbly execute those amazing grill marks. Two handles on the side allow for easy insert and removal. I found it super easy to clean with some warm soapy dishwater and a scrub brush for sticky bits. This piece has some weight behind it.
Crisper Basket (dishwasher safe) – The crisper basket is used whenever you want to air fry dehydrate. The grill grate gets removed and the basket gets placed inside the cooking pot. Also, super easy to remove and clean.
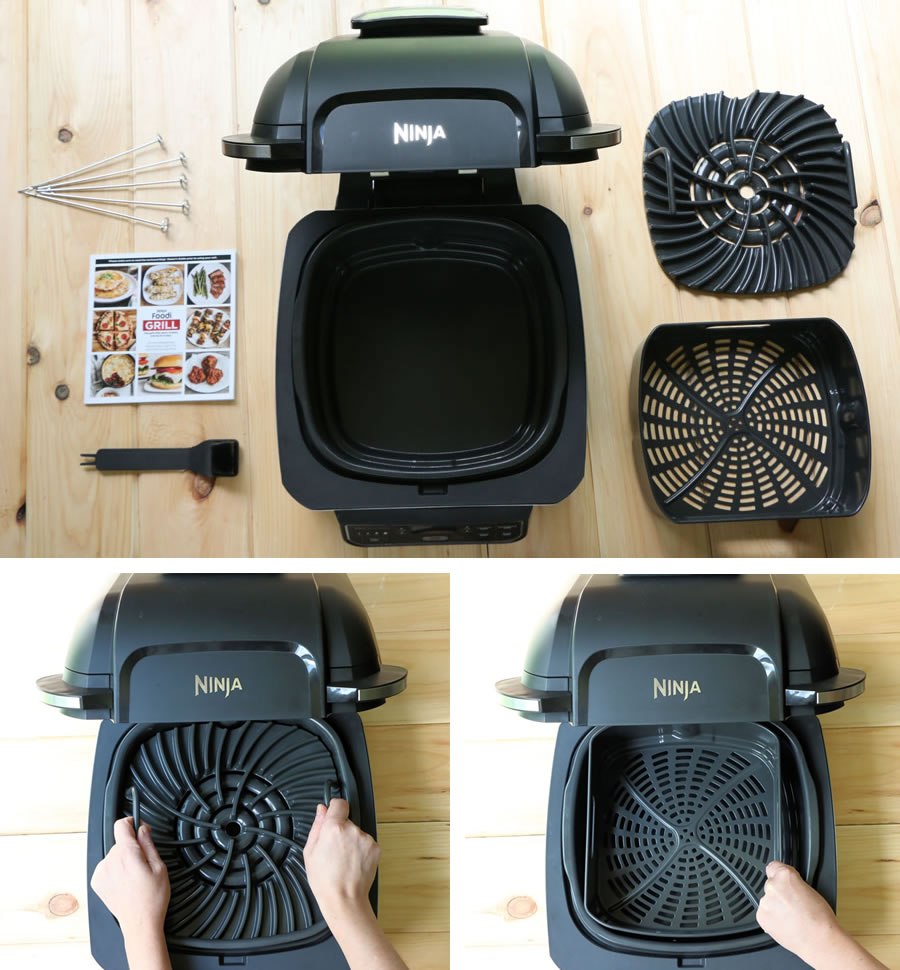
Kebab Skewers (dishwasher safe) – What’s more yummy than some grilled kebabs? 5 skewers came packed inside the box for instant grilling fun.
Cleaning Brush (dishwasher safe) — This little cleaning brush helps to scrub and scrape crusted on bits left stuck to the grate and splatter shield after grilling.
Ninja Foodi Grill Buying Tip: Most of us will do just fine with the base model of this grill. But if you like to have all the bells and whistles with all your kitchen gadgets then you might want to check out the upgraded model of Foodi Ninja Grill. It’s a little more money but comes with an integrated meat thermometer and an additional roasting rack.

The Major Benefits: Who Needs The Ninja Foodi Grill?
Even if you already have an outdoor grill, do you always feel like firing it up? Sometimes it can be a hassle especially if you’re only making a small quantity of food. What about when the weather isn’t ideal or you’ve run out of gas or charcoal briquettes? And the clean up can be a drag.
This is where the Ninja Foodi Grill comes in. It makes perfectly grilled food without having to plan or worry about your eyebrows burning off or if there’s a storm brewing. You can make delicious grilled dishes anytime you like, in any quantity, any time of year. It’s perfect for singles, couples and would make a great interactive cooking experience to use at your family or holiday parties.
The Ninja Foodi Grill grills meats that are fresh, marinated and even frozen. You don’t have to worry about defrosting! Every time you’ll get perfectly grilled steaks and super juicy burgers.
Recipes And Inspiration To Get You Started
If you love the idea of grilling but don’t have much experience the Ninja® Foodi™ Grill comes with a recipe inspiration booklet with 20+ great recipes to get you started. The back of the book includes cooking temps and times for just about every food you would want to grill, air crisp or dehydrate. This includes grilling temperatures and times for foods that are still frozen.
They include the basics everyone loves like steak and burgers, along with interesting twists on favorites like their air-fried Nashville Hot Chicken, personal grilled pizza, Mexican grilled corn, and grilled apple and raspberry pie.
Ninja Foodi Tip: Need More Recipe Inspiration? The Ninja family is launching a Foodi Family Community on Facebook where users can ask questions, get advice, and share recipes.
Making The Recipe: VIETNAMESE MIXED GRILL
While this recipe may seem like a lot of ingredients, it’s very easy to make. It’s mostly stirring, marinating, and grilling. Here are the ingredients:
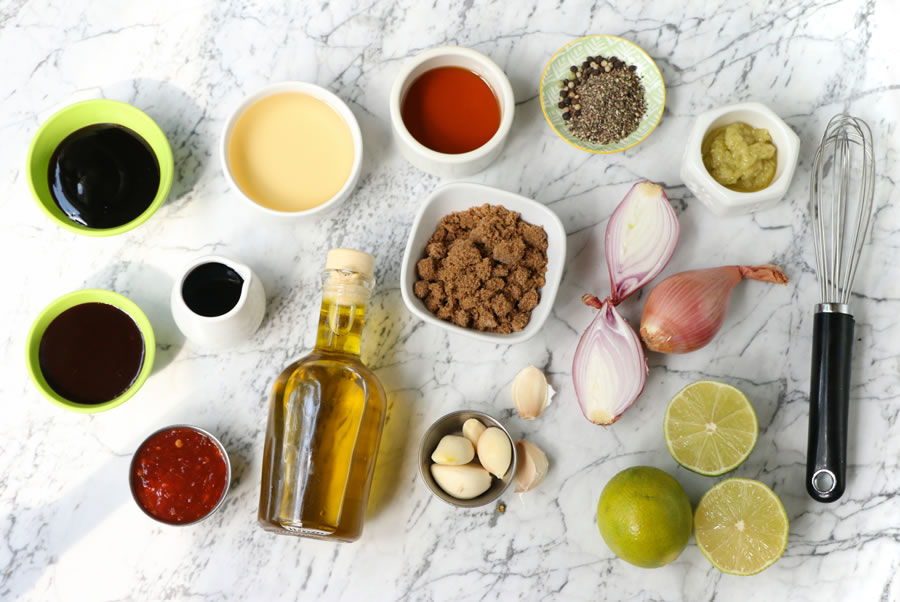
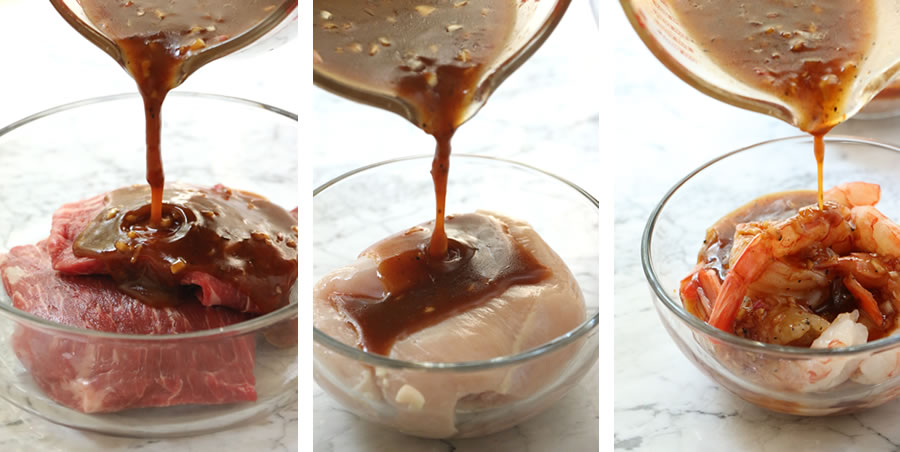
For this Vietnamese-inspired marinade ingredients like rice wine vinegar, fish sauce, hoisin sauce, oyster sauce, brown sugar, fresh ground pepper, sambal oelek chili sauce, shallots, and lemongrass are blended and then poured over the meats. If you can’t find fresh lemongrass most supermarkets carry a paste version in the produce section by the herbs.
You can also omit this if you can’t find it either. Chicken and shrimp should be marinated for a minimum of 2 hours. For maximum flavor overnight is best while shrimp only need about 20 minutes. I threaded the shrimp on the kebab skewers for easy grilling.
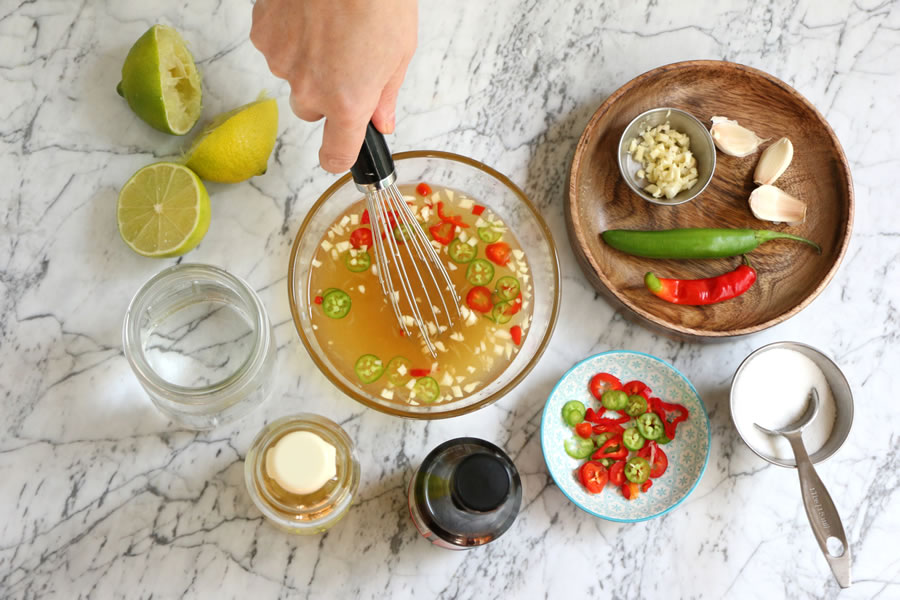
While the meats are marinating, prepare the Vietnamese dipping sauce. Don’t go without it. It’s absolutely addicting. And while a sauce with a base of fish sauce, garlic, chili, and lime juice might not seem appetizing, it is utterly delicious. Trust me.
The Ninja Foodi Grill was set to MAX and preheated. I brushed the grate with grape seed oil and got grilling. Grilling all the meats took about 25 minutes in total. Here they are below:
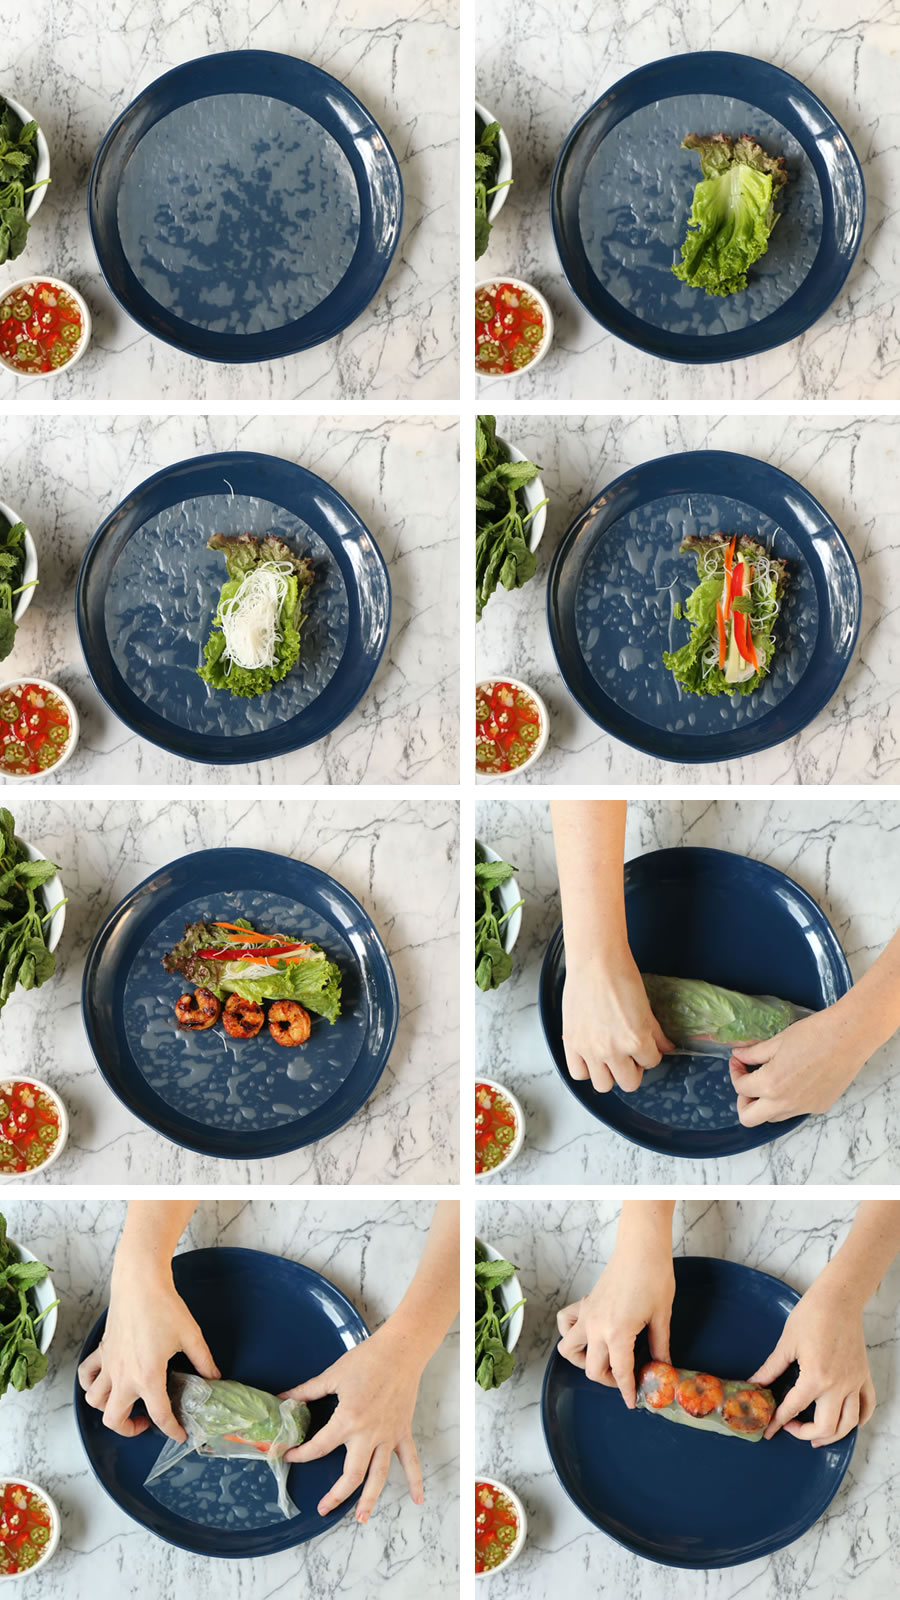
To serve: make a platter of lettuce leaves, cucumber sticks, carrot sticks, bell pepper slices and any other veggies you enjoy. Herbs like cilantro, basil and mint are essential. Vietnamese rice paper rolls and vermicelli rice noodles can be served along with the platter of meats, veggies, and herbs to be rolled and then dipped.
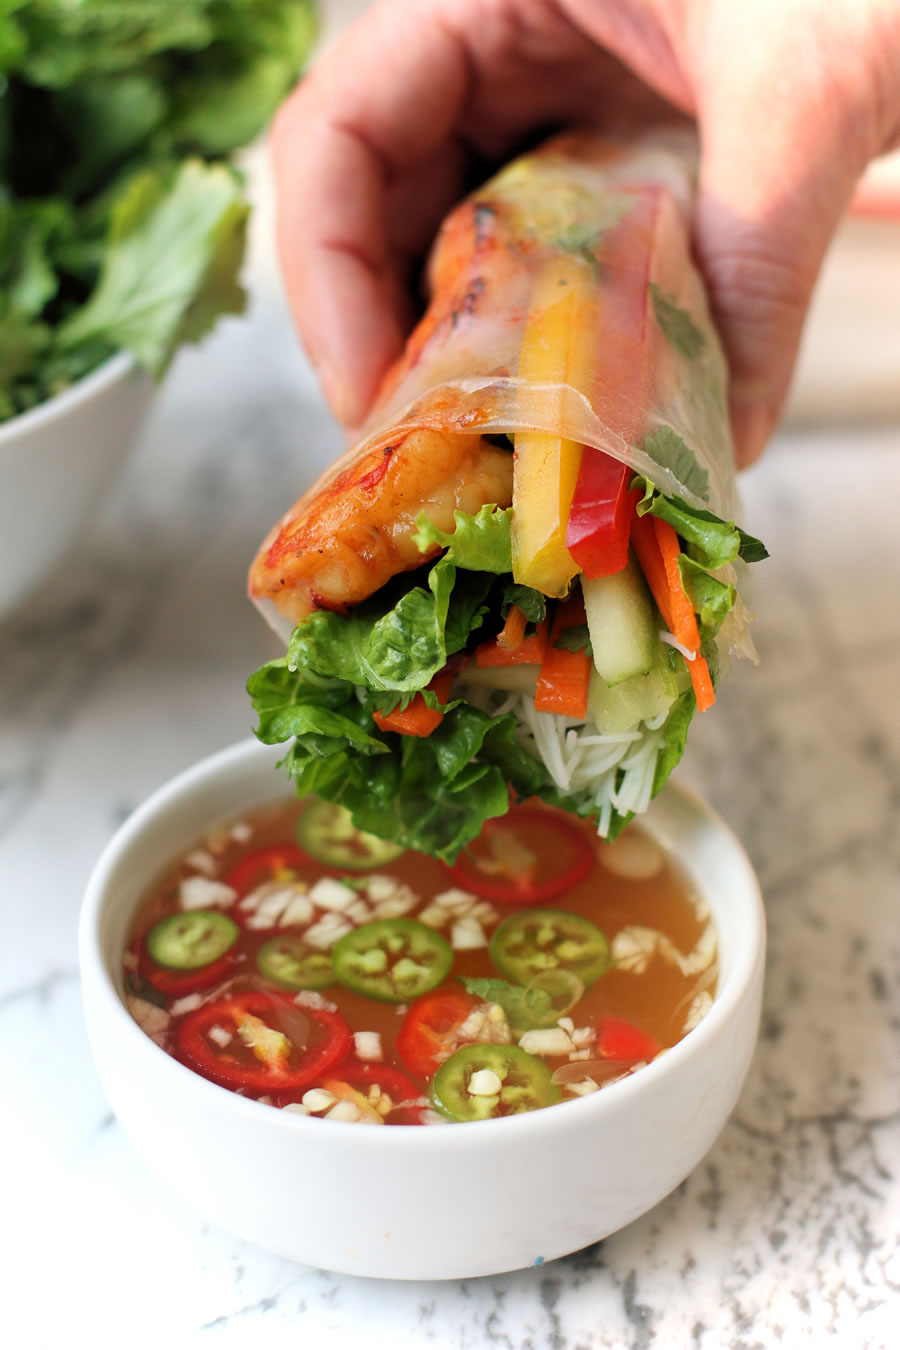
This makes a great dish to make when inviting over friends and family. Begin by gently dipping rice paper on a dish of water. Don’t over soak. Place on your plate and then fill with your favorite ingredients.
Here’s how to roll the Vietnamese rice paper with the fillings:
GET THE RECIPE!
Vietnamese Mixed Grill
Equipment
- Ninja® Foodi™ Grill
Ingredients
- 1.5 lbs chicken breast
- 1-2 lbs flat iron or sirloin steak
- 1.5 lbs extra large shrimp
Marinade Ingredients
- 2/3 cup grapeseed oil ( or other high smoke point oil)
- 2/3 cup rice wine vinegar
- 4 tbsp fish sauce
- 4 tbsp oyster sauce
- 3 tbsp hoisin sauce
- 3 tbsp brown sugar
- 1 tbsp soy sauce
- 1 tbsp lemon grass, chopped ( or 1 Tablespoon lemongrass paste found in produce section)
- 1 tbsp Sambal Oelek or asian chili paste
- 5 garlic cloves, chopped
- 2 tsp black pepper
Vietnamese Dipping Sauce Ingredients (Nuoc Cham)
- 1/4 cup fish sauce
- 1/4 cup lime juice
- 1/3 cup water
- 2 tsp sugar (or more to taste)
- 3 cloves of garlic, mined
- 1/2 tsp chilis, finely sliced (Thai Bird, Serrano or Jalapeno)
Suggested Accompaniments For Serving
- Vietnamese Rice Paper, for wrapping rolls
- lettuce leaves
- carrot sticks
- cucumber Sticks
- slices bell peppers
- Sambal Oelek Chili Sauce
- Hoisin Sauce
DIRECTIONS
Making The Marinade
- Combine all marinade ingredients in a blender and process until smooth. If you don't have a blender, whisk all ingredients in a medium size bowl and set aside. This marinade makes about 2 cups.
Marinating The Meats
- Pour the marinade over the steak and chicken (in separate bowls, about 1/3 cup each). Marinate in the refrigerator for at least 2 hours or overnight for best results. The shrimp only needs to be marinated for 15 to 20 minutes before grilling.
Grilling The Meats On The Ninja® Foodi™ Grill
- Remove the meats from the refrigerator and marinade letting as much drip off as possible. Preheat the Ninja® Foodi™ Grill on high. Brush the grill grates with grape seed, avocado or canola oil and grill the chicken first (14 minutes) flipping halfway through. The steak will take 7-9 minutes. Again, flip half-way through. Finally grill the shrimp for 3 minutes. You can flip if you like. Be sure to brush the grates before adding a new meat. When the meats are finished grilling remove to a platter and cover with foil to keep warm.
Making The Vietnamese Dipping Sauce (Nuoc Cham)
- Combine all ingredients in a small bowl good for dipping. Adjust seasonings according to taste. Add more chili for more heat if you like.
To Serve
- Sprinkle the platter of grilled meats with scallion and finely chopped peanuts. Serve along side the suggested lettuce and vegetables. Guests can dip the rice paper on a plate of warm water to moisten and then roll with meats and veggies for a delicious Vietnamese style treat. Don't over soak the rice paper or it becomes difficult to work with. 10 seconds is enough. Once rolled, dipping sauces can include the Nuoc Cham made above, hoisin sauce and sambal oelek chili sauce. Enjoy!
See our recipe for Thin & Crispy Air Fried Eggplant Slices
Learn how to Use Wood Chips in the Ninja Foodie Grill
For more recipe inspiration before you buy click the link to DOWNLOAD the FREE Ninja Foodie Grill Cookbook (PDF)!
Better Living uses affiliate links. If you make a purchase through them, we may receive a small commission (for which we are deeply grateful) at no cost to you.